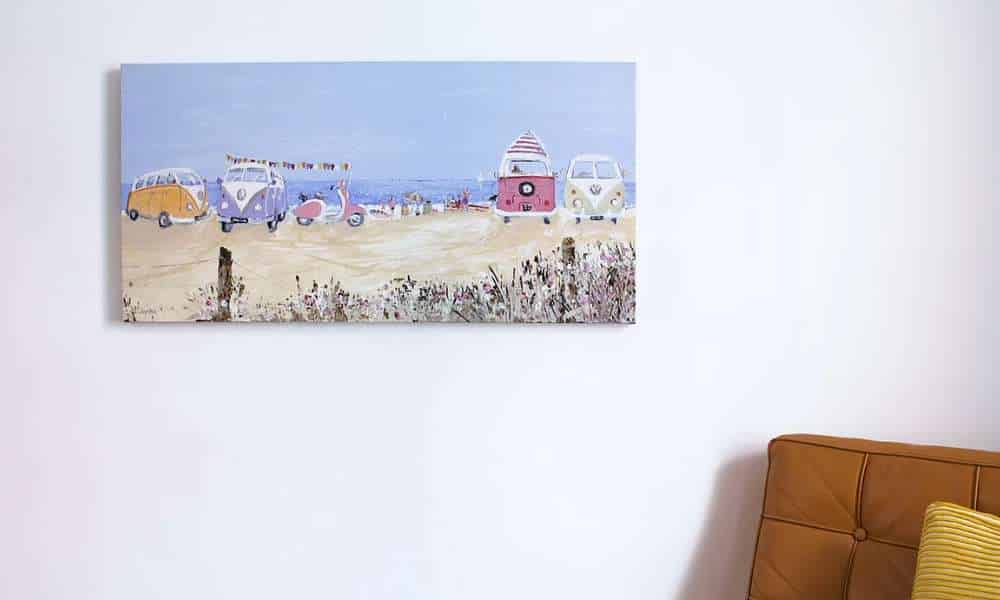
Transform your living space with ease as you learn how to hang shutterfly mounted wall art effortlessly. Enhance the ambiance of your home with personalized masterpieces that reflect your unique style and memories. Hanging shutterfly mounted wall arts not only adds aesthetic appeal but also showcases your cherished moments in a prominent way. With simple steps and the right tools, you can elevate your décor while preserving precious memories. Discover the importance of proper installation techniques and unlock the potential to create a captivating display that draws admiration. Whether you’re a seasoned decorator or a DIY enthusiast, mastering the art of hanging shutterfly mounted barrier art empowers you to curate a space that resonates with warmth and personality.
How Do I Properly Hang My Shutterfly Mounted Wall Art?
Properly hanging your Shutterfly mounted wall art involves a few key steps to ensure it is securely and aesthetically displayed. Firstly, select the appropriate hanging hardware based on the weight and size of your artwork. For smaller pieces, adhesive hooks or sawtooth hangers may suffice, while larger and heavier pieces may require screws or nails.
Can I Hang My Shutterfly Mounted Wall Art On Any Type Of Wall?
Yes, you can hang shutterfly mounted wall art on various types of walls, including drywall, plaster, concrete, and wood. It is important to ensure that the barrier surface is clean and smooth before hanging the artwork to ensure proper adhesion. Additionally, consider the weight of the artwork and use appropriate hanging hardware such as nails, screws, or picture hooks to securely mount it on the wall.
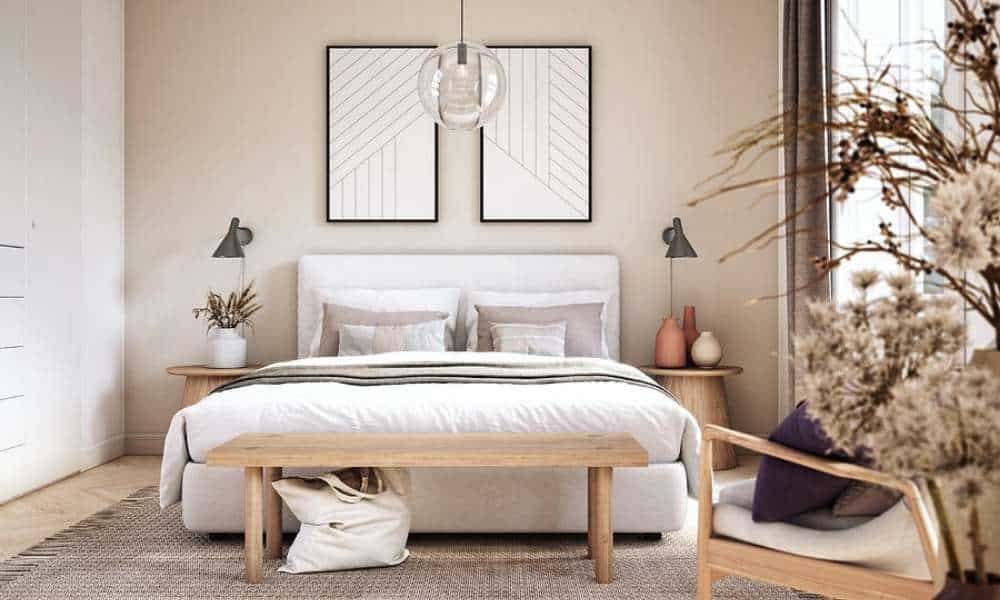
Prepare Wall Surface
1. Clean Surface
Before mounting any artwork, it’s crucial to start with a clean canvas—quite literally. Begin by wiping down the wall surface using a mild detergent or cleaner to remove any dust, dirt, or grease that may have accumulated over time. This ensures better adhesion for the mounting hardware and prevents any potential issues down the line. A clean surface provides the ideal foundation for showcasing your mounted barrier art in all its glory.
2. Repair Any Damage
Inspect the wall for any signs of damage such as cracks, holes, or uneven patches. Repairing these imperfections not only improves the overall appearance of your barrier but also ensures a stable base for hanging your artwork. Use spackling compound or plaster to fill in any holes or cracks, smoothing the surface with a putty knife for a seamless finish. Sand down rough edges and wipe away any excess filler before proceeding to the next step. Addressing these repairs beforehand prevents them from detracting from the beauty of your shutterfly mounted barrier art display.
3. Allow Surface To Dry
Once you’ve cleaned and repaired the wall surface, allow it ample time to dry completely before proceeding with the hanging process. Depending on the type of cleaner or filler used, this may take anywhere from a few hours to overnight. Rushing this step can compromise the adhesion of the mounting hardware and lead to potential issues such as peeling or instability. Patience is key to achieving a flawless finish that showcases your mounted wall art in the best possible light.
Tighten Hanging Hardware
Tightening hanging hardware is a crucial step in ensuring the stability and longevity of your shutterfly mounted barrier craft. Before beginning the installation process, carefully inspect the hardware provided by Shutterfly to ensure it is securely fastened to the back of the artwork. Use a screwdriver or similar tool to tighten any screws or bolts, as loose hardware can result in the artwork becoming detached from the barrier over time. By taking the time to tighten the hanging hardware before hanging your shutterfly mounted barrier art, you can enjoy peace of mind knowing that your artwork is securely affixed to the wall.
Use Stud Finder For Secure Installation
Using a stud finder for secure installation is essential for preventing your shutterfly mounted barrier craft from becoming dislodged or damaged over time. Studs provide a secure anchor point for hanging heavy objects, such as framed artwork, mirrors, or shelves. Before hanging your shutterfly mounted barrier art, use a stud finder to locate the studs behind the barrier. Once you have identified the studs, use a pencil to mark their locations on the barrier. When hanging your artwork, be sure to use screws or nails long enough to penetrate the drywall and anchor securely into the studs. This will help distribute the weight of the artwork evenly and prevent it from pulling away from the wall.
Avoid Hanging Artwork In Direct Sunlight
Avoiding hanging artwork in direct sunlight is essential for preserving the quality and appearance of your shutterfly ascended wall art. Exposure to direct sunlight can cause fading, discoloration, and deterioration of the artwork over time. To protect your artwork from sun damage, choose a location for hanging that is away from windows, skylights, or other sources of direct sunlight. If hanging artwork in a room with windows, consider using curtains, blinds, or shades to block out sunlight during the brightest parts of the day. By taking proactive measures to avoid hanging your shutterfly ascended wall art in direct sunlight, you can ensure that it remains vibrant and beautiful for years to come.
Allow Surface To Dry Thoroughly
Allowing the surface to dry thoroughly before hanging your barrier wall art is essential for ensuring a secure and long-lasting installation. Before applying any hanging hardware or adhesive to the wall, thoroughly clean the surface to remove any dust, dirt, or debris. Allow the surface to dry completely before proceeding with the installation process. This will help ensure that the hanging hardware or adhesive adheres properly to the wall and provides a secure anchor for your artwork. By allowing the surface to dry thoroughly before hanging your shutterfly ascended wall art, you can avoid potential issues such as peeling, bubbling, or instability.
Confirm Stability And Balance
Before embarking on the process of hanging shutterfly mounted barrier craft, it’s crucial to confirm the stability and balance of the chosen wall. Assessing the structural integrity ensures that your artwork will be securely mounted without risking damage to either the art piece or the barrier itself. Utilize a stud finder to locate sturdy anchor points, which provide optimal support for heavier pieces, ensuring they remain steadfast even in high-traffic areas. By prioritizing stability and balance, you not only safeguard your investment but also create a visually appealing display that exudes confidence and finesse.
Clean Any Smudges Or Fingerprints
A pristine canvas sets the stage for a flawless display of shutterfly ascended wall art. Before proceeding with installation, meticulously clean any smudges or fingerprints that may mar the surface of the artwork. Utilize a soft, lint-free cloth lightly dampened with water or a mild cleaning solution to gently wipe away dirt and grime. This simple yet crucial step ensures that your artwork shines with brilliance, allowing its vibrant colors and intricate details to command attention. By presenting your shutterfly ascended wall art in its best light, you elevate the overall aesthetic of your space and create an inviting atmosphere that captivates onlookers.
Ensure Proper Lighting With Visibility
Precision is key when it comes to hanging shutterfly ascended wall craft, making accurate measurements an essential aspect of the process. Begin by determining the desired placement of the artwork, taking into account factors such as eye level and surrounding décor elements. Using a measuring tape, carefully note the dimensions of the wall space to ensure proper alignment and spacing. This meticulous approach allows you to create a visually harmonious arrangement that complements the proportions of the room while maximizing the impact of your chosen artwork. By meticulously measuring wall dimensions, you set the stage for a polished presentation that commands admiration and attention.
The Final Thought
Hanging shutterfly mounted wall art can be a simple and rewarding process when following the recommended steps. By choosing the right location, using appropriate tools, and ensuring proper alignment, you can enhance the aesthetic appeal of your space with personalized artwork. Taking the time to measure and plan before hanging your piece will result in a professional and polished look. Remember to step back and admire your handiwork once the artwork is securely in place. With these guidelines in mind, you can confidently display your ascended wall art with pride. Elevate your home decor today by showcasing your cherished memories through meaningful wall art installations.