Making wind cuts in curtains is an essential yet suitable technique for adding both style and value to your window prescriptions. Whether you want to permit a fragile breeze, work on the classy charm of your curtains, or add a touch of uniqueness to your home style, wind cuts can be a marvelous game plan. In this helper, How to make wind slits in curtains we will walk you through the little-by-little course of how to make wind cuts in your shades, allowing you to achieve a changed and practical window covering that supplements your space flawlessly. Accordingly, we ought to get everything going on this DIY journey to raise your window hangings to an inconceivable level.
1. Measure Shade
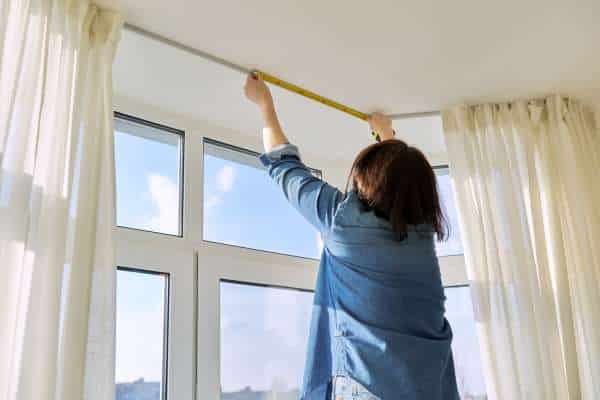
To begin the most widely recognized approach to making wind cuts in your shades, the underlying step is to check your curtain sheets. Use an estimating tape to choose the length of your curtains, ensuring that you have a sensible cognizance of the space where they will be hung. It’s fundamental to quantify both the width and level of your curtains, as this information will help you with picking where and the number of breeze slices you want to add. Definite assessments will ensure that your breeze cuts are consistently separated and estimated, making a sensible and captivating result. Hence, take as much time as essential with this fundamental push toward setting the foundation for a productive wrap change.
2. Mark Cut Spots
When you have your wrap assessments nearby, the accompanying fundamental stage during the time spent making wind cuts means the spots where you want to make the cuts. Lay your shade board level on an immaculate, broad surface, and use a surface pencil or chalk to delicately stamp the regions for the cuts. Consider factors like the shade’s width, the best distance among cuts, and the level at which you keep up with that they ought to begin. Precision in checking is essential to ensure that your breeze cuts are uniform and stunningly fulfilling. Taking as much time as is required during this stage will help you with achieving the ideal outcome and assurance that your breeze cuts fill a utilitarian need as well as redesign the general look of your shades.
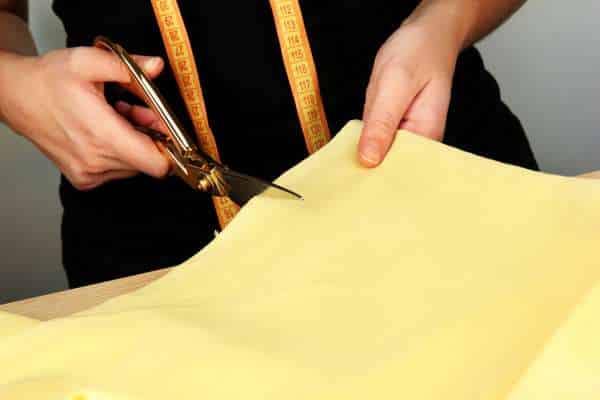
3. Cut Little Openings

After circumspectly signifying the spots for your breeze cuts on the wrap load up, this present time is the perfect open door to go on toward the ensuing stage: cutting little openings. Using sharp surface scissors, follow the markings you’ve made to make the openings for the cuts. Start with a touch of section point and logically widen it relying upon the circumstance to oblige your optimal cut size. Be careful while cutting, ensuring that the edges stay awesome and free from fraying. Review that it’s for each situation better regardless of more humble openings and make changes as expected, as you can without a doubt widen them later if vital. Taking as much time as possible during this stage will ensure that your breeze cuts are immaculate, uniform, and perfectly estimated for your shades.
4. Support Edges
To help the edges of your as-of-late breeze cuts in curtains, you can use a fundamental yet convincing technique. This step incorporates holding the surface back from fraying and ensuring the life expectancy of your wrap board. To do this, you can use a surface stick or a sewing machine. On the off chance that you pick a surface stick, apply an unassuming amount along the edges of each cut, allowing it to dry. For a more intense consummation, consider sewing along the edges with a straight join using a matching string tone. Supporting the edges adds strength as well as presents a cleaned concentration to your wrap cuts, ensuring that they get through ordinary use and stay aware of their appearance long term.
5. Trim Cuts
Managing the cuts is a critical push toward the most widely recognized approach to making wind cuts in wraps, as it adds both development and style to the finished look. To achieve this, carefully wrinkle the surface on the sides of each cut inside, making an ideal and even overlay. You can safeguard the overlay with surface pins or fastens to keep it set up. Then, at that point, pick between hand-sewing or using a sewing machine to line along the fell edge. A straight join or a confound secure, dependent upon your tendency, will help with staying aware of the sew’s trustworthiness. This managing framework sustains the edges of the cuts as well as gives them a skillfully finished appearance, it is helpful as well as elegantly fulfilling to ensure that your shades are.
6. Iron Level

After fixing the cuts, giving your curtains a new and clean look by squeezing them level is central. Set your iron to the fitting surface setting for your curtain material and assurance it is freed from any water or steam. Lay the curtain board on an ideal, level surface, and carefully run the iron over the entire board, truly zeroing in on the locale around the breeze cuts. This step kills any crimps or kinks as well as sets the trims up, How To Weigh Down Outdoor Curtains. Squeezing your curtain’s level is the last detail that lifts their outward presentation and sets them up to improve your windows with style and ease.
7. String Drape Pole
With your breeze cuts impeccably managed and your window hangings putting the best version of themselves forward, this moment is the perfect open door to string the curtain shaft. Begin by picking a reasonable wrap shaft that supplements your inside expressive design and window viewpoints. Accepting that your shade bar has removable finials, dispense with them to make hanging more clear. Slide the concealed bar through the openings made by your breeze cuts, starting from one side and working your way to deal with the following. Be fragile to do whatever it takes not to hurt the surface or the bar. At the point when the post is hung through, secure any finials or end covers back onto the bar if key. This step conveys your curtains the slightest bit closer to enriching your windows and allowing you to participate in their redesigned handiness and upscale appeal.
8. Hang Drape

Hanging the shade bar is the crucial second when your curtains begin to have their spot in your window space. Ensure that you’ve picked the fitting level and position for your curtain bar areas, complying with the principles for your specific window size and tendency. Using a level, mark the right situation for the segments on the wall. Then, securely affix the segments using the given screws and anchors, if important. At the point when the segments are set up, mindfully slide the hung curtain post into them. Ensure the bar is level and consistently arranged inside the segments. This step maintains your curtains as well as gives the design to show off their allure and helpfulness in your living space.
9. Change The Length
Before you consider your wrap project all out, stop briefly to change the length of a key. Depending upon your window’s size and your arrangement tendencies, you could need to deal with the curtains to achieve the best fit. Measure from the lower part of the curtain to the ideal length, ensuring that the shades hang just over the floor or in the specific region you like. Carefully trim any overflow surface, guaranteeing the cut is straight and clean. If you’ve fixed the window hangings in the wake of cutting the breeze cuts, you could need to re-sew the as-of-late overseen edge to keep a perfect appearance. This step ensures that your curtains look perfect as well as fit reliably into your window space, giving the last detail to your home-style project.
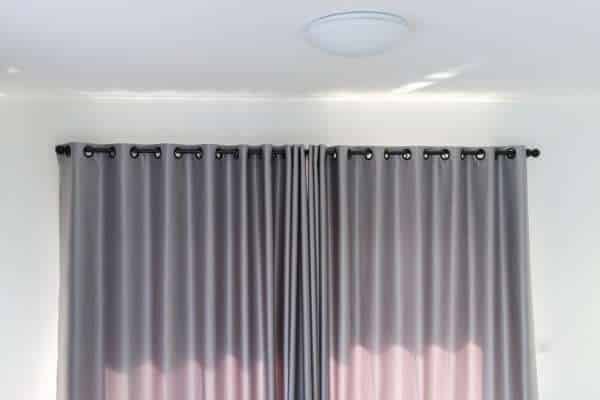
10. Partake in A Windy Style
With your breeze cuts magnificently made, conceals managed and changed, and the curtain bar securely set up this moment is the best opportunity to participate in the superb consequence of your undertakings — a breezy style that adds a hint of classiness and value to your black living room décor ideas. These breeze cuts update the vibe of your shades as well as grant the sensitive movement of air into your room, making a more pleasant and inviting environment. Whether you’ve chosen to make formal, custom-fitted cuts in significant window hangings or nice, carefree ones in lightweight surfaces, your shades as of now have a clever allure that isolates them. Embrace the resuscitating breeze and revel in the stylish difference in your windows, making your home a more magnificent and drawing-in spot to be.
Conclusion
In conclusion, Adding wind slices to your curtains is a clear yet powerful technique for raising your home style and participating in the benefits of an additional breeze current. By following the immediate advances outlined in this helper, you can achieve a clean and realistic plan that supplements your inside plan while making your living spaces more pleasing. Whether you choose to make wonderful cuts in legitimate drapes or go for a nice look with lightweight surfaces, these DIY breeze cuts offer adaptability and allure. Subsequently, feel free to on this imaginative trip and watch as your window hangings change as well as bring a stimulating breeze into your home, making it an inviting and pleasant spot to be.