Changing outside wooden furniture with a new layer of paint can reinvigorate your open-air space, improving its stylish allure and strength. Whether you’re reviving endured pieces or adding a pop of variety to plain surfaces, painting open-air wooden furniture requires cautious readiness and execution to guarantee enduring outcomes. How To Paint Outdoor Wooden Furniture In this aide, we’ll investigate the bit-by-bit cycle to accomplish an expert completion, from preparing the wood to applying the last defensive sealant. With the right strategies and materials, you can easily restore your outside furnishings and make an enticing desert garden for unwinding and delight.
1. Prep Wood: Sand, Clean, Dry.
Preparing the wood is an urgent initial phase in painting open-air wooden furniture to guarantee a smooth and dependable completion. Start by sanding the surface to eliminate any harshness, old paint, or flaws, utilizing medium-coarseness sandpaper for introductory smoothing and better-coarseness sandpaper for a cleaned outcome. After sanding, completely clean the wood to eliminate residue, soil, and flotsam and jetsam utilizing a gentle cleanser arrangement and a wipe or brush, trailed by flushing with clean water and permitting it to dry. Guaranteeing the wood is perfect and dry before painting helps the paint stick better and forestalls dampness-related issues, like stripping or rising, down the line.
2. Prime: Even Coat.
When the wooden furniture is appropriately prepared, the subsequent stage is to apply groundwork to make a smooth and uniform surface for the paint to stick to. Pick a great open-air preliminary reasonable for wood surfaces and apply it equally across the whole piece utilizing a paintbrush or roller. Guarantee exhaustive inclusion, particularly in regions where the wood grain might be more articulated or where past paint layers have been taken out. The groundwork upgrades the grip as well as assists with fixing the wood, giving a steady groundwork to the paint and working on its sturdiness against outside components. Permit the groundwork to dry totally as indicated by the producer’s guidelines before continuing with the artwork cycle.
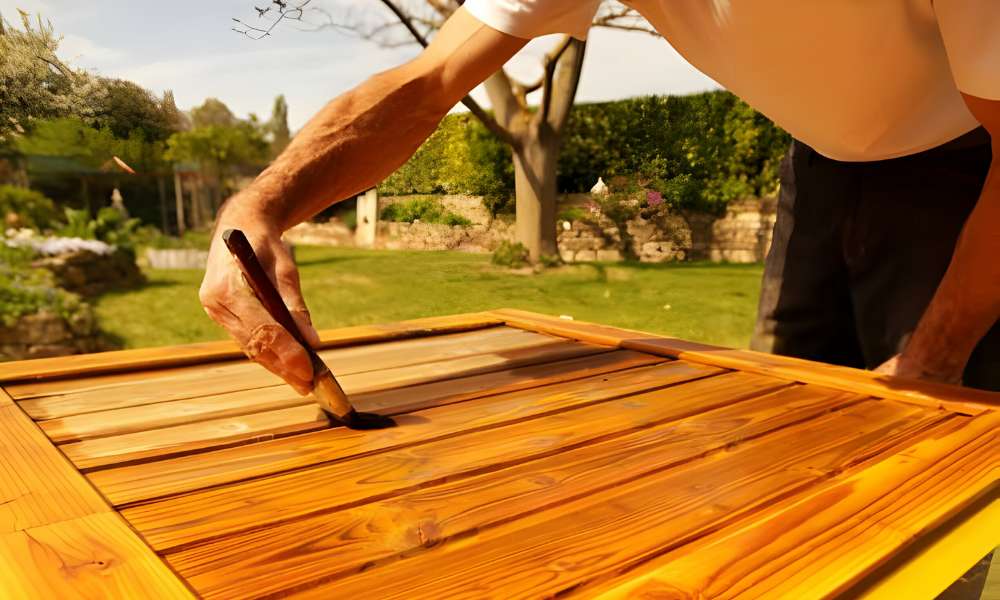
3. Base Coat: Apply Evenly.
After making preparations, now is the ideal time to apply the base layer of paint equally across the open-air wooden furnishings. Select an excellent outside paint explicitly formed for open-air use and reasonable for wooden surfaces. Utilizing a paintbrush or roller, apply the base coat in smooth, even strokes, working with the grain of the wood to guarantee uniform inclusion. Give close consideration to subtleties and corners, guaranteeing everywhere is enough covered. Applying the base coat equitably improves the presence of the furniture as well as gives a strong groundwork for the resulting layers of paint. Permit the base coat to dry before applying extra covers or continuing to any beautiful accents.
4. Dry: Completely.
After each layer of paint, it’s fundamental to permit the outside wooden furniture to dry before continuing with the following stage. Legitimate drying time is critical for accomplishing a smooth and sturdy completion. Place the furniture in a very ventilated region away from direct daylight and dampness to work with quicker drying. Contingent upon the kind of paint utilized and ecological circumstances, drying times might differ, so it’s fundamental to allude to the paint producer’s directions for explicit direction. Surging this step can prompt lopsided drying, tasteless surfaces, and More ways To Paint Outdoor Furniture, compromising the general nature of the completion. Find the opportunity to guarantee each coat dries completely before continuing toward the following phase of the work of art process.
5. Second Coat: Smoothly.
When the principal layer of paint has dried totally, now is the ideal time to apply the second coat flawlessly to accomplish a faultless completion on your open-air wooden furnishings. Involving a similar procedure as in the past, whether with a paintbrush or roller, apply the second coat uniformly and with delicate, consistent strokes. Guarantee careful inclusion, particularly in regions that might have seemed lighter or less hazy after the main coat. This subsequent coat assists with improving the variety of energy and solidness of the paint, giving added insurance against outside components like daylight, dampness, and temperature vacillations. Take as much time as is needed to apply the second coat without a hitch, holding back nothing appearance across the whole surface of the furnishings. Permit the second coat to dry before considering extra covers or final details.
6. Dry: Again.
After applying the second layer of paint without a hitch, it’s essential to permit the outside wooden furniture to dry completely and by. Legitimate drying guarantees that the paint sets appropriately, making a sturdy and enduring completion. Place the furniture in a very ventilated region away from residue, trash, and direct daylight to work with ideal drying conditions. Contingent upon the sort of paint utilized and ecological factors, for example, dampness and temperature, drying times might fluctuate. It’s fundamental to adhere to the paint producer’s directions concerning drying times to guarantee the best outcomes. Hurrying this step might bring about lopsided drying, cheap surfaces, or even harm to the paintwork. Persistence is vital; permit the furniture to dry before dealing with or utilizing it to guarantee a faultless completion.
7. Details: Add Accents.
When the base layers of paint have dried completely, you can add brilliant accents and subtleties to your open-air wooden furniture to hoist its visual allure. Think about utilizing stencils, painter’s tape, or freehand strategies to make complex plans, examples, or boundaries. Pick integral tones or differentiating tints to add interest and character to the furniture pieces. Whether you’re adding enhancing themes, mathematical shapes, or eccentric twists, take as much time as is needed to guarantee exact application and clean lines. These little subtleties can have a huge effect on the general taste of your outside space, changing normal furniture into eye-getting central focuses. Permit any extra accents or subtleties to dry before continuing with the last strides of fixing and safeguarding the painted surface.
8. Seal: Protect Surface.
Whenever you have finished the canvas cycle, it’s fundamental to seal the outer layer of your wooden furniture to give added security against the components. Pick a great open-air sealant explicitly intended for wooden surfaces. Utilizing a paintbrush or roller, apply the sealant equitably across the whole painted surface, guaranteeing intensive inclusion. The sealant goes about as an obstruction, protecting the paint from dampness, UV beams, and other open-air components that could cause blurring, breaking, or disintegration after some time. Permit the sealant to dry totally as per the maker’s guidelines before putting the furniture outside or presenting it to nasty weather conditions. Normal reapplication of sealant, as suggested by the producer, will assist with keeping up with the trustworthiness and life span of the painted wrap-up, guaranteeing your outside wooden furniture stays energetic and safeguarded into the indefinite future.
9. Dry: Thoroughly.
In the wake of applying the sealant to your outside wooden furnishings, it’s fundamental to permit it to dry completely before presenting the furniture to open-air conditions. Legitimate drying guarantees that the sealant shapes a defensive obstruction over the painted surface, upgrading its strength and life span. Place the furniture in a very much-ventilated region away from direct daylight and dampness, permitting more than adequate time for the sealant to fix. Contingent upon the kind of sealant utilized and ecological factors, for example, temperature and stickiness, drying times might fluctuate. It’s vital to adhere to the producer’s directions concerning drying times to guarantee ideal outcomes. Hurrying this step might think twice about the adequacy of the sealant, prompting untimely wear or harm to the painted completion. Practice persistence and permit the sealant to dry completely before partaking in your recently painted open-air wooden furnishings.
10. Enjoy: Relax Outside!
Now that your outside wooden furniture is delightfully painted and secured, now is the ideal time to sit back, unwind, and partake in your open-air space. Whether you’re facilitating social events with loved ones, relishing calm minutes alone with a decent book, or just absorbing the excellence of nature, your recently revived furniture gives the ideal setting to outside delight. Enjoy the lively tones, the smooth completion, and the upgraded strength of your painted furniture pieces. With legitimate upkeep and care, your outside desert spring will keep on being a wellspring of unwinding and revival into the indefinite future. Thus, snatch a virus drink, sink into your number one seat, and lounge in the peacefulness of your outside retreat.
Conclusion
Painting open-air wooden furniture is a compensating Do-It-Yourself project that can revive your outside space and expand the life expectancy of your furniture pieces. By following the illustrated advances and concentrating on legitimate readiness and application, you can accomplish a wonderful and enduring completion. Make sure to pick great materials appropriate for outside use and to permit adequate time for each coat to completely dry. With persistence and tender loving care, you can change your outside furniture into dazzling central focuses that upgrade the excellence and usefulness of your open-air living region for quite a long time into the future. Thus, focus on, release your imagination, and partake during the time spent giving your open-air wooden furniture a lively new look